

Extra photos for bloggers: 1, 2, 3 Want to be a game piece in Candyland? Want to ride a roller coaster down the Rocky Mountains? Now you can do it all!
Get Started for FREE
Sign up with Facebook Sign up with X
I don't have a Facebook or a X account


 Your new post is loading...
 Your new post is loading...
Your new post is loading...
Extra photos for bloggers: 1, 2, 3 Want to be a game piece in Candyland? Want to ride a roller coaster down the Rocky Mountains? Now you can do it all! 
No comment yet.
Sign up to comment
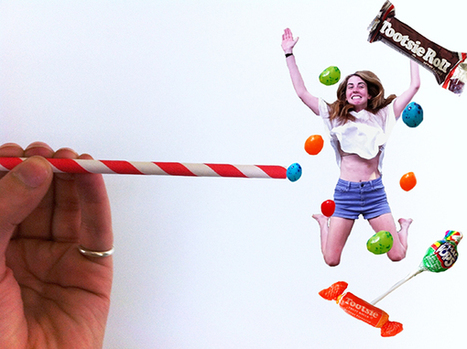
A few weeks ago, I came across this video by Joe Fellows explaining how to create “parallax” effects on photos using a combination of Photoshop and After Effects.
Kitty Fisher's insight:
Animating images with the CSS Keyframe is an efficient way of bringing to life those 2 second video gifs that have you staring at the image for minutes at a time. What's great about this tutorial is it teaches you that you can select a small fraction of the picture instead of transforming the entire still to become animated.
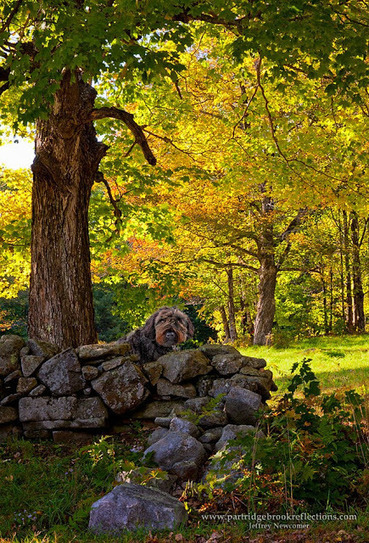
I thought this might be a good place to address these common questions, and share a few shooting and editing insights that have been useful along the way.
Kitty Fisher's insight:
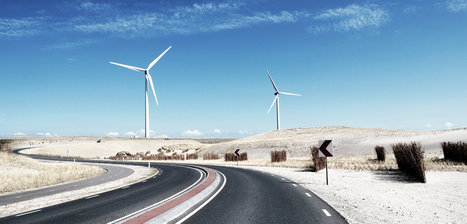
Adobe and Photoshop are not just for the pro's anymore. Watch as Mark demonstrates in his video, how simple you can make layering. And how one simple adjustment can bring out the warm colors that you've already received in your image.
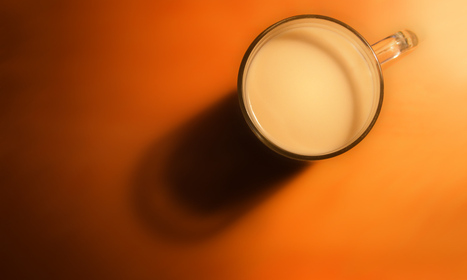
In this episode of The Complete Picture, Julieanne demonstrates how to take multiple exposures and combine them into a single 32-bit HDR file that can then be edited nondestructively using Adobe Camera Raw as a Smart Filter in Photoshop.
Kitty Fisher's insight:
Using camera RAW as a Smart Filter, this epsiode on The Complete Picture with Julieanna Kost adds a vibrant boost of knowledge. You can take multiple images and combine them into a 32-bit file, edited in a way that means you won't lose any data. Also taking the Raw and using it as a filter, is the best way to work with a layered bundle.

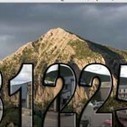
This tutorial will show you how to create a simple and fun layered text effect using the 3D capabilities, and will show you some cool tips and tricks that can be used whenever working in the 3D environment in general as well.
Kitty Fisher's insight:
Using a 3D environment, you will want to know some tips and tricks that can make your creation quicker. In this tutorial, which will be a simple and fun effect to work with.
There are many great books and tutorials about Photoshop but I want to talk briefly about a few of the essential elements of the program which make it such a revolutionary and essential part of my creative work.
layer may be used to modify the appearance of the underlying image layer(s) in a broad range of ways. Layer Masks are not actual independent layers but are best thought of as a window placed over an Image or Adjustment Layer to control how it is seen. The basic rule is, "White reveals, Black conceals".
Kitty Fisher's insight:
Everday magic and getting it right. This small sentence has never been completely true. Layers are probably the most important aspect to knowing photoshop.

The photo app development team at Pixite LLC, in partnership with award-winning creative technologist Ben Guerrette, is excited to announce the addition of ND Patterns + Shapes pack by photographer and designer Neal Dieker in Tangent 1.2 for the iPhone and iPad. The pack is based on NDPATTERNS, the downloadable pattern overlays by Neal Dieker widely used by photographers and artists to create stunning effects on photos. NDPATTERNS overlays have been downloaded over 100,000 times and used in over 75,000 images on Instagram. Users now can directly apply NDPATTERNS overlays using the ND Patterns + Shapes pack inside Tangent 1.2, a creative tool that lets anyone easily transform their photos into one-of-a-kind works of art using combinations of patterns, shapes, and blends. ND Patterns + Shapes quickly adds effects that can subtly change or completely alter the look and feel of a photograph, a skill set once reserved for graphic artists. "As one of the many inspirations behind Tangent, Neal's patterns are a welcome addition that fit nicely into the geometric photo overlay theme," says Tangent's creator and lead developer Ben Guerrette. "ND Patterns + Shapes stands out by taking a more subtle approach to the image enhancement capabilities of Tangent while showcasing the wide range of effects that the app provides." The eye-catching patterns and shapes included in the pack are some of many included in Tangent.
Kitty Fisher's insight:
As you skim across of the words on-fo-a-kind works of art, well you have my attention. With NDPATTERNS overlays working with the ND Patterns + Shapes pack inside of the Tangent 1.2 tool. You can transform any photo into a relentless, brilliant graphic art. Genius for eye popping colors and new graphic adventures.
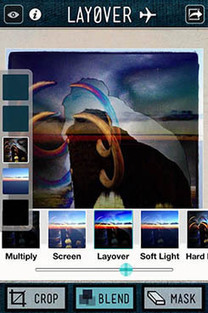
From the makers of Diptic, Layover is a photography app that lets you blend the colors and textures of up to five photos to create a single image. Shake to clear functionality lets you quickly clear settings and photos and start over. Option to clear photos after exporting an image, allowing you to easily start over with a fresh canvas. Button to exit out of temporary zoom. Improved in-app help. Support iPhone 5 and iOS 6. Layover makes blending images together simple and fun. Select up to five photos, pick a blend filter, and use the slider to control how much you would like to blend. Then play around with the order of your images and the different blend effects to achieve your desired look.
Kitty Fisher's insight:
Layers in an app. Blending colors and textures, and you can layer up to 5 images, to create the effect you want. This is good for those digital artists on the go, I have ended up using the soft light layer quite a bit, to enhance the softness of a sunset or any harsh colors.
In this tutorial we will cover masking with Paintbrush, masking using the Colour Range selection tool, how to Move, Copy and Invert masks to other Adjustment Layers, how to adjust the Mask's Edge, and finally, using the Gradient Tool to mask. Let's say you apply a Curves layer or Levels Adjustment Layer, but once it is applied, you realize there is part of the image you do not want that layer to affect. What to do? Go to your layers window, click on the mask (white box) next to the layer you want to mask. Now, take your paintbrush, set the size and opacity (Keyboard Shortcuts) you need, and paint with the paintbrush over the part of the image you want to change.
Kitty Fisher's insight:
This may be a lengthy tutorial but it will give a very understandable view for Masking with a Paintbrush. It is stated what should be noted when it comes to layer masks using only shades of grey.
|
Using layers in your photo editing software is one of the most important things you can do to create great images. Layers are so powerful, even the most basic understanding of them can improve your photography tremendously. The good news is that using layers is extremely easy, and very quick. …
Kitty Fisher's insight:
The beginning to layers, everyone needs a little pick me up on this one. Layers can become second nature, while others tend to struggle figuring out what will make their image pop without overly saturated intentions.
Pixelmator is an easy-to-use, fast, and powerful image editing app for the Mac. In this tutorial, we will dive deeper into the concept of layers by creating a collage made out of four images. Lets get started! | Difficulty: Beginner; Length: Quick; Tags: Tools & Tips, Photoshop
Kitty Fisher's insight:
Layers can end up looking like you've just thrown some pictures together on the program Paint. But Pixelmator has a useful range when you want to create a collage using the concept of layers.
Artware's Latest Release of layrs App Upgrades Object-Masking Technology for Higher Accuracy | Virtual Strategy Magazine is an online publication devoted entirely to virtualization technologies.
Lindsey Davis's insight:
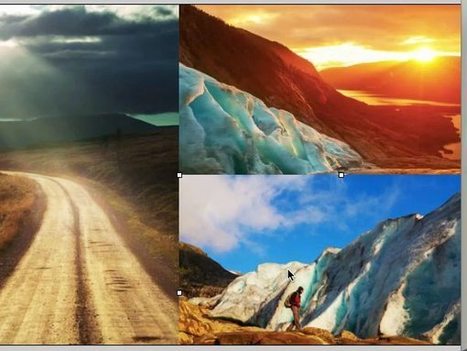
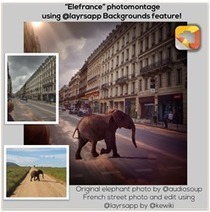
A new app that's just hit the stores is letting users separate their photos into layers, using new technology to distinguish the foreground from the background and combine each with other photos. "layrs" is the first app of its kind, automating the 'magic lasso tool' to create a user-friendly way to transport your pets and friends to deserts and icy tundras in just a couple of taps.

Photoshop layer styles are used to add beautiful and realistic effects to each individual layer and they are great time savers for designers.You can add amazing and fully editable effects without a lot of effort. Photoshop comes wih basic layer style effects but you can also find realistic photoshop layer styles either for free or paid.
Kitty Fisher's insight:
Layers for every possible occasion or idea. There tends be a lack of Photoshop Layers from time to time. So here is a healthy dose of what you may have been looking for.
Lithuanian developer The Pixelmator Team has released Pixelmator 3.0 FX, a major update to its popular Mac image-editing tool.
Kitty Fisher's insight:
Since the OS X Mavericks has full support behind the Version 3.0, it will act faster and on a more prominent performance. This Layer styling tool, can allow you to apply multiple effects all at the same time. So now more waiting around and using one template.

“In the two previous installments of my series on Mextures, we saw how to layer individual components onto your photos, and how to save particular combinations of those layers as Formulas. This time we’ll wrap up by showing you how to use the pre-packaged formulas that come with Mextures, and review how to modify those formulas for your own photos. All in all, I consider Mextures to be a very powerful app for your grunge needs. (Your grunge needs? Who would have guessed I’d ever write that?) The power of the app is in the flexibility, based in the number of filters, how those filters can be modified, and the multiple layers that can be rearranged and modified individually until you’ve got it right. Getting rid of the forced square crop made this app one that I would not soon get rid of. I hope these tutorials have helped you in your use of Mextures.
Kitty Fisher's insight:
Mextures is all about 'formula's' and layers. For more of that 1970's bright haze look to a more shadowed, vignette overlay to give that old school noir camera feel.
It sounds easy, doesn’t it? Duplicate one layer’s layer mask on another layer. It is easy but only if you know the technique. A layer mask is a channel that determines the visibility of the content of that particular layer. If multiple layers require the same areas of transparency, you can create a single layer mask and copy it to the other layers. We’ll start with a look at creating layer masks. A layer mask enables you to create areas of transparency on a layer without erasing the layer content. Since the layer’s entire content is still available (although partially hidden), you can later edit the layer mask to change the visibility. NOTE: Keep in mind that a layer named “Background” (in italics) cannot have areas of transparency. Simply double-click the layer name in the Layers palette and rename the layer. That converts the layer to a regular layer, enabling you to show/hide areas selectively with a layer mask. Creating Layer Masks
Kitty Fisher's insight:
As I've been learning to create a set of layers. Starting out with a few basics to truly get the hand of duplicating, this tutorial will help you immensely.
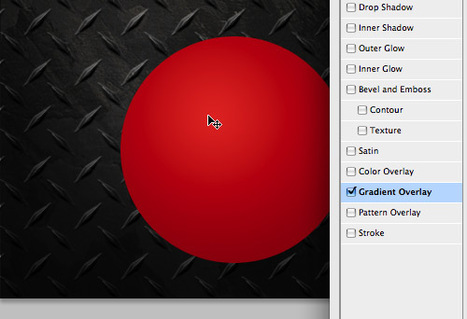
Layer Styles are nothing new. They’ve been used and abused again and again. Despite their ubiquity, or perhaps because of it, many designers do not yet realize the full potential of this handy menu. Its beauty lies in our ability to create an effect and then copy, modify, export, hide or trash it, without degrading the content of the layer.
Kitty Fisher's insight:
To redefine your design, layering can be your best friend. With different styles, it can be hard to choose which one, you want to use. So these techniques can give you a bump effect or the ever rising 3-D modeling.
|


No being a pro at Photoshop for this fun layering app! With this tutorial from uploading your photos to fine tuning and making a stamp. Learning your way around this cool app could turn your world into a miniature adventure.