Image Effects, Filters, Masks and Other Image Processing Methods
25.3K views | +1 today
Follow
Your new post is loading...
Scoop.it!

Photoshop CC sneak peek: new Focus Masks feature @ Weeder

Photoshop CC sneak peek: new Focus Masks feature @ Weeder | Image Effects, Filters, Masks and Other Image Processing Methods | Scoop.it

Adobe published a new Photoshop CC sneak peek video of Focus Masks. This is most likely one of the new features that will be announced on June 18th. Here is the video.

Kitty Fisher's insight:

A sneak preview of Adobe's Focus Masks, claiming that what was already new is yet brand new all over again. Be on the look out for the date mentioned above to capture all the details and unveiling of this new project.

No comment yet.
Scoop.it!

Exposure Blending Using Luminosity Masks Tutorial @ Weeder

Exposure Blending Using Luminosity Masks Tutorial @ Weeder | Image Effects, Filters, Masks and Other Image Processing Methods | Scoop.it

Until then, in order to produce an image with a high dynamic range of light, you have to work with the sensors available to you and create your own post-processing magic.

Kitty Fisher's insight:

The cleaner alternative for HDR programs, happens to be the Luminosity Masks that hand over quality instead of quantity. By messing with the range of lighting, without destroying the natural magic that a certain time of day can give us.

No comment yet.
Scoop.it!

10 Things You Need to Know About Masking in Photoshop | Psdtuts+

10 Things You Need to Know About Masking in Photoshop | Psdtuts+ | Image Effects, Filters, Masks and Other Image Processing Methods | Scoop.it

In this tutorial, we will explain 10 things you need to know about masking in Photoshop. To help you apply interesting and exciting effects of your images. Masking is one of the most important techniques or skills to learn in Photoshop.

Kitty Fisher's insight:

Transparency can be a pain, but knowing ten different options in how you can use your masks in Photoshop. Now that's a deal. There of course is the opacity level but hey, over lapping images can make one masterpiece of an image.

No comment yet.
Scoop.it!

Getting it Right in the Digital Camera : Everyday Photoshop Magic : Layers

Getting it Right in the Digital Camera : Everyday Photoshop Magic : Layers | Image Effects, Filters, Masks and Other Image Processing Methods | Scoop.it

There are many great books and tutorials about Photoshop but I want to talk briefly about a few of the essential elements of the program which make it such a revolutionary and essential part of my creative work.
The newest flashy features are always fun to play with, but the continuing strength of the program has much more to do with the long established tools that have been refined over the years, but in their simplest form remain the core of this magical window on photography.  My goal is not to provide detailed tutorials, but to help those unfamiliar with the program to develop an appreciation of its power and to understand why it is worth the effort to incorporate it into their creative process.  Full versions of Photoshop come with a substantial sticker shock, but most of what I will be discussing can be done in Photoshop Elements and a variety of other editing programs for a substantially reduced cost.


Adjustment layers work in the same way as Image Layers but they contain processing instructions rather than pixels. An Adjustment

layer may be used to modify the appearance of the underlying image layer(s) in a broad range of ways.

Layer Masks are not actual independent layers but are best thought of as a window placed over an Image or Adjustment Layer to control how it is seen.  The basic rule

is, "White reveals, Black conceals".

Kitty Fisher's insight:

Everday magic and getting it right. This small sentence has never been completely true. Layers are probably the most important aspect to knowing photoshop.

No comment yet.
Scoop.it!

Matt Greer Photography: Photoshop Layer Masks Tutorial

In this tutorial we will cover masking with Paintbrush, masking using the Colour Range selection tool, how to Move, Copy and Invert masks to other Adjustment Layers, how to adjust the Mask's Edge, and finally, using the Gradient Tool to mask.

Let's first start with some background. Layer masks are applied to specific layers and affect what part(s) of a layer (or Adjustment Layer) apply to the image, and to what degree. You can black-out entire parts of a layer, or reduce its effect by greying-out parts of the layer.

We discussed Adjustment Layers in another tutorial, but you are not limited to this kind of layer.

Let's say you apply a Curves layer or Levels Adjustment Layer, but once it is applied, you realize there is part of the image you do not want that layer to affect. What to do? Go to your layers window, click on the mask (white box) next to the layer you want to mask. Now, take your paintbrush, set the size and opacity (Keyboard Shortcuts) you need, and paint with the paintbrush over the part of the image you want to change.

Kitty Fisher's insight:

This may be a lengthy tutorial but it will give a very understandable view for Masking with a Paintbrush. It is stated what should be noted when it comes to layer masks using only shades of grey.

No comment yet.
Scoop.it!

How To Apply Textures To Your Photographs - Digital Photography School

How To Apply Textures To Your Photographs - Digital Photography School | Image Effects, Filters, Masks and Other Image Processing Methods | Scoop.it

Let me start off by saying that I don’t use textures all that often, but there are certainly times where I feel that an image could use just a little something extra. 

Kitty Fisher's insight:

Adding texture to an image means overlaying a top to what already exists. A cool tool to either bring out the retro, old fashioned or even if you find the right texture a futuristic touch to any platform.

No comment yet.
Scoop.it!

Photoshop Layer Masks: Applying a Layer Mask @ Weeder

Photoshop Layer Masks: Applying a Layer Mask @ Weeder | Image Effects, Filters, Masks and Other Image Processing Methods | Scoop.it

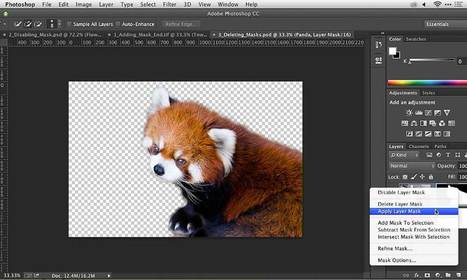
We've explored layer masks in-depth recently. If you make a great mask and you want to apply it, you can make the effect permanent.

Kitty Fisher's insight:

A comprehensive video to the 338 Layer Masks that Photoshop has. This is a must known advantage when using Adobe Photoshop.

No comment yet.
Scoop.it!

Using layer masks with Photoshop

Using layer masks with Photoshop | Image Effects, Filters, Masks and Other Image Processing Methods | Scoop.it

Peter Bargh explains how you can use the valuable Layer Mask option of Photoshop to make better colour changes and selections, in this step by step image editing technique. 

Explaining how to do selective coloring using the History Brush and here's how to do a similar job using more controllable Layer mask.

Kitty Fisher's insight:

Having more of a handle on using layer masks will make you more aware of your layer palette. Learning about converting and doubling images into a new layer. Peter Bargh is a bit more indepth about the control purposes of the adjustments.

No comment yet.
Scoop.it!

Creating and Duplicating a Layer Mask

Creating and Duplicating a Layer Mask | Image Effects, Filters, Masks and Other Image Processing Methods | Scoop.it

It sounds easy, doesn’t it? Duplicate one layer’s layer mask on another layer. It is easy but only if you know the technique. A layer mask is a channel that determines the visibility of the content of that particular layer. If multiple layers require the same areas of transparency, you can create a single layer mask and copy it to the other layers. We’ll start with a look at creating layer masks. A layer mask enables you to create areas of transparency on a layer without erasing the layer content. Since the layer’s entire content is still available (although partially hidden), you can later edit the layer mask to change the visibility. NOTE: Keep in mind that a layer named “Background” (in italics) cannot have areas of transparency. Simply double-click the layer name in the Layers palette and rename the layer. That converts the layer to a regular layer, enabling you to show/hide areas selectively with a layer mask.

Creating Layer Masks
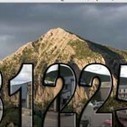
A basic layer mask can be created by making a selection of the area of the layer that you want visible and then clicking the Add Layer Mask button at the bottom of the Layers palette. In this example, the Horizontal Type Mask tool was used to create a selection in the “shape” of a zip code.

Kitty Fisher's insight:

As I've been learning to create a set of layers. Starting out with a few basics to truly get the hand of duplicating, this tutorial will help you immensely.

No comment yet.