Image Effects, Filters, Masks and Other Image Processing Methods
25.3K views | +1 today
Follow
Your new post is loading...
Scoop.it!

16 Batch Image Processors and Editors – Best of

16 Batch Image Processors and Editors – Best of | Image Effects, Filters, Masks and Other Image Processing Methods | Scoop.it

Most of us deal with images when writing content for the Web. Whether you’re a student, blogger, designer, photographer, or just the average user; you may need to process images one time or another. Even if it is not for work, you may need to upload images on your social network, or mail vacation photos to relatives. Basically, you need to edit and process your images.


Image processing is a time-consuming, repeittive and sometimes much-hated thing to do but it has to be done. In situations like these, batch image processors and editors come in handy. They can process many images at a time, as per the set configuration, helping you save precious time for other more important matters or tasks.


Below are a collection of 16 great batch image processors and image editors. Start processing your pictures and images more easily and efficiently today.

Kitty Fisher's insight:

Between image processing and using editors for certain categories. A main program that I tend to use is the image converter, tranferring one format into another.  Along with Sizerox which always you to organize in one window, name, crop and rotate to how you want your image to come out.

No comment yet.
Scoop.it!

Mextures - iPhone Photography App Tutorial - Part 3 - By Jerry Jobe ...

Mextures - iPhone Photography App Tutorial - Part 3 - By Jerry Jobe ... | Image Effects, Filters, Masks and Other Image Processing Methods | Scoop.it

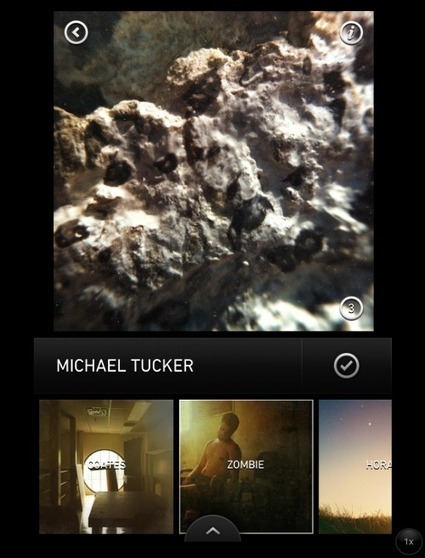
“In the two previous installments of my series on Mextures, we saw how to layer individual components onto your photos, and how to save particular combinations of those layers as Formulas. This time we’ll wrap up by showing you how to use the pre-packaged formulas that come with Mextures, and review how to modify those formulas for your own photos.


All in all, I consider Mextures to be a very powerful app for your grunge needs. (Your grunge needs? Who would have guessed I’d ever write that?) The power of the app is in the flexibility, based in the number of filters, how those filters can be modified, and the multiple layers that can be rearranged and modified individually until you’ve got it right. Getting rid of the forced square crop made this app one that I would not soon get rid of. I hope these tutorials have helped you in your use of Mextures.

Kitty Fisher's insight:

Mextures is all about 'formula's' and layers. For more of that 1970's bright haze look to a more shadowed, vignette overlay to give that old school noir camera feel.

No comment yet.
Scoop.it!

12 Free And Amazing CSS3 Image Hover Effects For Downloads | Free and Useful Online Resources for Designers and Developers

12 Free And Amazing CSS3 Image Hover Effects For Downloads | Free and Useful Online Resources for Designers and Developers | Image Effects, Filters, Masks and Other Image Processing Methods | Scoop.it

In this round up, you will discover some cool and amazing CSS3 image hover effects that you can download for free. By using these image hover effects, you can make your web design look more interactive and visually appealing. These effects are created with the help of CSS3 that has made creating appealing visuals easier for the web developers.


Kitty Fisher's insight:

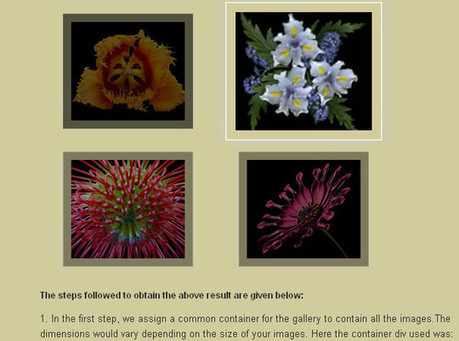
In this combined batch of image hover effects, you'll be taken step by step an even creating some mockup versions of your own to get you started. It's always great being able to test out a few effects without having to indulge in a big spending endeavour.

No comment yet.
Scoop.it!

Imagenomic Releases Realgrain 2 Image Effects Software

Imagenomic Releases Realgrain 2 Image Effects Software | Image Effects, Filters, Masks and Other Image Processing Methods | Scoop.it

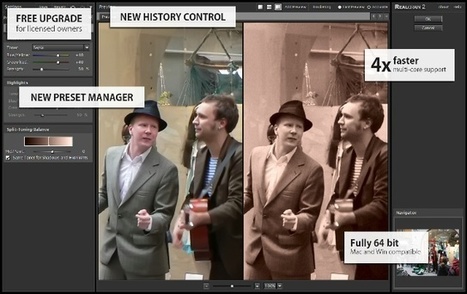
Imagenomic announced the release of its Realgrain 2 image effects software plugin. Realgrain 2 is a finishing plugin for Adobe Photoshop Creative Cloud, CS5/CS6, Adobe Photoshop Elements 11, and Apple Aperture. The effect helps users to produce images that simulate the grain patterns, color, and tonal range of silver halide films for a film-like effect from digital images. Realgrain 2 has had several upgrades. First, Realgrain 2 has increased processing speeds of up to four times its predecessor.  Second, a new Preset Manager now allows photographers to create presets with multiple categories and gives users a place to make special. Third, Realgrain 2 comes with a number of pre-defined effect presets and a library of 25 color and 20 black-and-white film presets. Finally, the new History Control also allows an unlimited number of history steps for unlimited adjustments without losing previous steps.

"Realgrain addresses the 'last-mile' of the workflow, a critical and final stage in making the photograph. If you are looking for a superior black-and-white conversion, toning and color effects or long for the darkroom age to achieve the soft, warm graininess of film, then Realgrain 2 is the plugin for you," explains Art Ghazaryan, Co-CEO and COO of Imagenomic.  "Realgrain provides a multitude of finishing effect combinations that enable virtually an endless alphabet for creative expression. And now that it provides the same interface and processor as Imagenomic's Portraiture and Noiseware, photographers have access to an ideal suite of image enhancement software products that can seamlessly work into their image complete workflow process."

Kitty Fisher's insight:

Realgrain, takes the long adjusted time of darkroom hours into one last bit of critical final stage making of that photo conversion. This second version, this is a finishing plugin for Creative Cloud, giving that grainy effect. This is absolutly perfect for someone that tends to change the majority of their color photos over to monochrome.

No comment yet.
Scoop.it!

Pixelmator Update Adds 2x Speed Increase, Background Syncing, Better File Handling | Cult of Mac

Pixelmator Update Adds 2x Speed Increase, Background Syncing, Better File Handling | Cult of Mac | Image Effects, Filters, Masks and Other Image Processing Methods | Scoop.it

Pixelmator, a popular photo editor on the Mac, was updated today to version 2.2.1. Don't let the number fool you; the new version packs some big improvements. Most notably, the app's overall speed has been increased twofold and edits are now automatically saved in the background.


"We've done some radical improvements behind the scenes," said the app's developers. "One of them is a new Pixelmator file format. It's still the same file format you are used to, yet it now has a completely new architecture that takes advantage of the modern OS X technologies making your image editing even faster and more enjoyable." Reengineering the file format has brought better intergration with OS X's Quick Look.

The speed increase means it's faster to open and save files, and savin to iCloud takes less time because the app only syncs image edits as they are made, not full copies of the image each time.


Pixelmator, a popular photo editor on the Mac, was updated today to version 2.2.1. Don’t let the number fool you; the new version packs some big improvements. Most notably, the app’s overall speed has been increased twofold and edits are now automatically saved in the background.

“We’ve done some radical improvements behind the scenes,” said the app’s developers. “One of them is a new Pixelmator file format. It’s still the same file format you are used to, yet it now has a completely new architecture that takes advantage of the modern OS X technologies making your image editing even faster and more enjoyable.” Reengineering the file format has brought better integration with OS X’s Quick Look.


Read more at http://www.cultofmac.com/247065/pixelmator-update-adds-2x-speed-increase-background-syncing-better-file-handling/#ARAZOx5b6sCES7EK.99
Kitty Fisher's insight:

Better file handling, that's what got me about Pixelmator. And the image effects are kind of outstanding to say the least. It takes less time to save your iamges and can create a magical element without it looking too childish.

No comment yet.
Scoop.it!

Layover App - Layers and Layers of Photo Blending Fun

Layover App - Layers and Layers of Photo Blending Fun | Image Effects, Filters, Masks and Other Image Processing Methods | Scoop.it

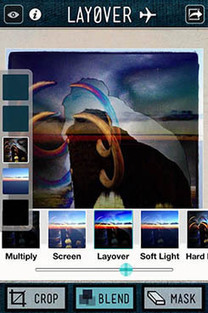
From the makers of Diptic, Layover is a photography app that lets you blend the colors and textures of up to five photos to create a single image.


Shake to clear functionality lets you quickly clear settings and photos and start over. Option to clear photos after exporting an image, allowing you to easily start over with a fresh canvas. Button to exit out of temporary zoom. Improved in-app help. Support iPhone 5 and iOS 6. Layover makes blending images together simple and fun. Select up to five photos, pick a blend filter, and use the slider to control how much you would like to blend. Then play around with the order of your images and the different blend effects to achieve your desired look.

Kitty Fisher's insight:

Layers in an app. Blending colors and textures, and you can layer up to 5 images, to create the effect you want. This is good for those digital artists on the go, I have ended up using the soft light layer quite a bit, to enhance the softness of a sunset or any harsh colors.

No comment yet.
Scoop.it!

7 common image processing mistakes - and how to avoid making them | Wex Photographic

7 common image processing mistakes - and how to avoid making them | Wex Photographic | Image Effects, Filters, Masks and Other Image Processing Methods | Scoop.it

When it comes to image quality, correct technique is only half the battle. If you really want to get the best out of your camera you should also know what you’re doing in the digital darkroom. That’s not to say that post-production should replace camera techniques and the idea of getting it right as you’re shooting – it shouldn’t. It’s just that if you want the maximum quality you’ll be shooting Raw images, and if you shoot Raw images you’ll need to process them to some extent.

Processing can be as easy or as difficult as you want to make it. You can simply apply a preset to a Raw image and make nothing more than a minor tweak to sharpening or noise reduction, or alternatively you may wish to take every aspect into your own hands and take time to process with utmost precision. Whichever way you go about it, there are a few things to bear in mind which should ensure your images don’t result with any unsightly artefacts or obvious signs of editing. Here are seven common mistakes photographers make when it comes to processing and what you can do to avoid them.

Kitty Fisher's insight:

Mistakes that happen to all of us. There never will be a time when we can improve, like when it comes to compression artefacts, those small blocks that blur out the closer you zoom in on the photo.

Then when you get a bit overzealous with over-sharpening...just don't. It's hard to not want the clearest photo. But re-frame from doing so.

No comment yet.
Scoop.it!

Make photos 3D with 3DEFY

Make photos 3D with 3DEFY | Image Effects, Filters, Masks and Other Image Processing Methods | Scoop.it

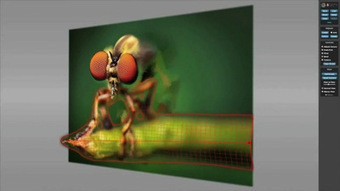
Image processing is making leaps and bounds as processors shrink and cloud computing takes off. It’s gotten to the point where depth can be extrapolated from single-shot photos; it takes some fancy algorithms and intense calculations, but programs can simulate/predict shapes, textures, and colors of occluded areas of a photograph. In other words, software makes a very educated guess that the blue sky will continue to be blue behind people, and the backs of heads will be round and have hair that’s of similar color and texture as what’s visible. With relative size and distance approximations, depth can also be determined. The new service 3DEFY does some version of this to generate 3D printable images from ordinary photos.


You may remember BumpyPhoto, which offers a similar service. The differences are that 3DEFY gives users control over the creation of the image and their paying for the conversion. BumpyPhoto sells actual prints. 3DEFY sells 3D files that users can then have printed by whatever service they prefer. The modeler is fairly easy to use: upload a photo, trace the subjects, push/pull to preference, and set some basic print parameters. Images can also be bent and turned. It’s fun to play with.

Kitty Fisher's insight:

3D images are becoming more and more pronounced. With 3DEFY, which can bring to 'life' your single shot photo, determining the size and distance approximations, so that the depth of the background can be calculated. This new service charges for the conversation not the print in the end, you'll have to find another place that will print out your result, elsewhere. I like this idea and you would want to test it out...maybe for a mixed media project?

No comment yet.
Scoop.it!

PSD.rb

PSD.rb | Image Effects, Filters, Masks and Other Image Processing Methods | Scoop.it
The Photoshop file format is over 23 years old, yet it remains one of the most opaque file formats out there. PSDs are very widely used, yet Adobe has never produced an easy way for developers to work...
No comment yet.
Scoop.it!

10 Things You Must Know About Photoshop Brushes | Psdtuts+

10 Things You Must Know About Photoshop Brushes | Psdtuts+ | Image Effects, Filters, Masks and Other Image Processing Methods | Scoop.it

You might be surprised what you don’t know about Photoshop Brushes. In this tutorial, we will cover the 10 most important things you must know about them. These tips cover several features including basic controls, keyboard shortcuts, brush settings, shape dynamics, scattering, turning images into brushes, and so much more.

You can quickly and easily change the Opacity of your brush, which will control the visibility of each brushstroke. If you reduce the Flow value you will be able to draw over the same area several times with one brushstroke and the used color will build up. If you want to use this build-up effect without even moving your brush then you can turn on the Airbrush option. You also have two controls in the Options bar to control the Opacity and the Size of your brush with Pressure sensitive drawing tablets.

Kitty Fisher's insight:

I've never thought about knowing any top ten basics, when it comes to the Photoshop brushes. You just click and fumble around, deciding if you want that design or not. To help better serve the purpose that you need and want, this list helps immensely.

No comment yet.
Scoop.it!

CSS Named Filter Effects — Non-Destructive Effects for Images and Elements - Vanseo Design

CSS Named Filter Effects — Non-Destructive Effects for Images and Elements - Vanseo Design | Image Effects, Filters, Masks and Other Image Processing Methods | Scoop.it

Like clipping and masking, filters have long been the domain of graphic editors. For example if you wanted to change the saturation of an image, you’d open an editor, make the changes, save the image, and be on your way. Before too long we’ll skip the graphic editor and filter our images through css alone.


As with most of the future css I’ve been covering the last few weeks, browser support isn’t there yet, but it’s probably better than you expect. Chrome, Safari, Opera, iOS Safari and Blackberry browser all have support in some way, while IE, Firefox, Opera Mini, and Android Browser don’t. That’s 5 to 4 in favor of support if you’re counting.


The css filter effects spec is the longest of any I’ve covered recently so I won’t even attempt to go over everything here. Instead we’ll look at the simplest way to add filter effects today and continue with a couple of other ways in the coming weeks. Hopefully after today you’ll get a feel for the possibilities css filters provide.

What are CSS Filter Effects?


If you’ve worked with filters in a graphic editor before then you should have an idea what filters are. In css they’re a way to process how an element will render on the screen before it’s actually displayed. They were originally created for SVG, but they’ve expanded beyond SVG alone.


When a browser renders a page, elements will first be drawn to a buffer, where the filters are applied and then they’ll be drawn to the screen itself.


CSS filters are image based in that they take zero or more images as input. To these images a number of parameters are applied to create the desired effect and then a new image is produced as output for the screen.


Even though they’re considered to be image based they can be applied directly to non-image elements, hence the zero images as input.


Kitty Fisher's insight:

Finding a browser and an easy way to add on filters...well that's why I ended up reading this article. Some browers just do not compute with the css filter, yet you can still create digital art. And from that, a non-destructive way to keep the pixelization for your images, relatively unharmed.

No comment yet.
Scoop.it!

Top Image Systems Announces Innovative eFLOW(R) CrowdBridge Solution Developed Using Amazon Mechanical Turk | Virtual-Strategy Magazine

Top Image Systems Announces Innovative eFLOW(R) CrowdBridge Solution Developed Using Amazon Mechanical Turk | Virtual-Strategy Magazine | Image Effects, Filters, Masks and Other Image Processing Methods | Scoop.it

Top Image Systems Ltd. (Nasdaq:TISA) a leading ECM (Enterprise Content Management) and BPM (Business Process Management) and mobile content processing solutions provider, announced today the launch of its new and innovative eFLOW® CrowdBridge solution developed using Amazon Web Services (AWS), enabling secure and efficient data validation on crowdsourcing platforms. Leveraging and extending the robust web and cloud enablement capabilities of its recently released eFLOW5® platform, TIS has developed a crowdsourcing service using AWS that is available today on Amazon Mechanical Turk and allows enterprises to extract, mask and deliver components of structured and unstructured content from enterprise documents to the crowd, where it can be accurately, efficiently, economically and securely validated and returned to the enterprise's content management system


eFLOW CrowdBridge enables enterprises to flexibly adjust resources to actual work volume, preventing overload and bottlenecks at peak times and reducing overhead when demand is low. By supplementing or substituting on-site data validation resources using the crowd, enterprises will substantially reduce IT and labor resource costs. Enterprises can enjoy the low costs of off-site cloud-based manual data entry on the crowd platform with fully secure integration with their on-site data and document processing system and easily accessible Amazon S3 (Simple Storage Service) online file storage web service, helping enterprises to comply with certain enterprise data privacy protection regulations and without any additional investment in IT resources. The solution is in production at a leading enterprise in Europe, who reports high satisfaction from its implementation to date.  

"Our enterprise customers are interested in using Amazon Mechanical Turk with sensitive content," said Sharon Chiarella, Vice President, Amazon Mechanical Turk. "The TIS solution allows documents to be securely presented to workers in the Amazon Mechanical Turk marketplace. We are pleased that TIS has chosen to develop their solution on Amazon Mechanical Turk."

Kitty Fisher's insight:

Basically this awesome solution to data validation is that whenever there is an overload a peak times and a low demand flow...this system will stop that. Or at least be able to enjoy the secure, low rate of off-site manual data entry. Which is good news all around.

No comment yet.
Scoop.it!

Apple Granted Patent for Projection System with Depth Sensing - Patently Apple

Apple Granted Patent for Projection System with Depth Sensing - Patently Apple | Image Effects, Filters, Masks and Other Image Processing Methods | Scoop.it

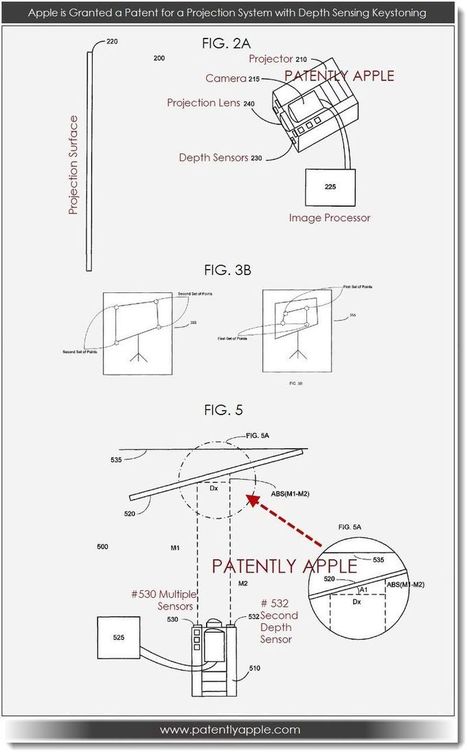
The US Patent and Trademark Office officially published a series of 43 newly granted patents for Apple Inc. today. In this particular report we cover another single patent that relates to an advanced projection system with depth sensors.


Apple has been granted a patent today for their invention relating to image processing systems and, more specifically, to depth sensing in combination with image processing for keystoning.


It appears that Apple has a team focused on all manner of projection systems. One of Apple's engineers by the name of Aaron Leiba that is listed as an inventor on this patent was also behind a mysterious high level projection system project that the patent filing described as being the Next Great Thing.


An issue that is common to many image projection systems is image distortion. An image projection system that is placed at a non-right angle with respect to the projection screen may result in distortion of the projected image on the projection screen. For example, the image for projection may be a square, but the projected image on the projection screen may appear to the viewers as a trapezoid, may appear elongated and so on. Correcting image distortion is referred to as "keystone correction" or "keystoning." Apple's granted patent presents a solution to this problem.


Kitty Fisher's insight:

Interesting...how Apple was granted a new patent that revolves around image processing. Well it sounds more like a mystery, to not only the viewer but nonetheless this is a great invention. Image distortion has been a troubled road with nearly every camera and this could further escalate Apple even more.

No comment yet.
Scoop.it!

Pixelmator Update, Common Image Processing Mistakes to Avoid and the new Layover app

Pixelmator Update, Common Image Processing Mistakes to Avoid and the new Layover app | Image Effects, Filters, Masks and Other Image Processing Methods | Scoop.it

What was cool about the updated version of Pixelmator, is that while app's developers completely remodeled the architecture of the system to OS X technologies. But it was still the same basic format, so you wouldn't be wondering what tools you were clicking on. For me, I'm on a time limit so it runs two times faster and automatically saves edits to the background. Luckly Mac has been improving majority of their collection over the past few months...let's see if they have any new outcomes up their sleeves.


Image processing mistakes...happen. But you can prevent this, if you know what you are doing in the Digital Darkroom. I'll be honest, I would just hover over a button and hope that it would come out the way I wanted it to...without knowing I would be loosing image quality. Finding out that theour ph more you edit photo, the more you loose the original RAW image.


Diptic a new layover app, providing you with the ability to blend and add texture up to five over layed images. Pretty impressive for just an app and not a program installed on your laptop. Basically you use your finger to just slide the photos around and then blend until you find the satisfactory results you were looking for. Making it more transportable for the people who can't waste too much time but want to be creative.

No comment yet.
Scoop.it!

Photoshop Touch gives images the full treatment on the go | Macworld

Photoshop Touch gives images the full treatment on the go | Macworld | Image Effects, Filters, Masks and Other Image Processing Methods | Scoop.it

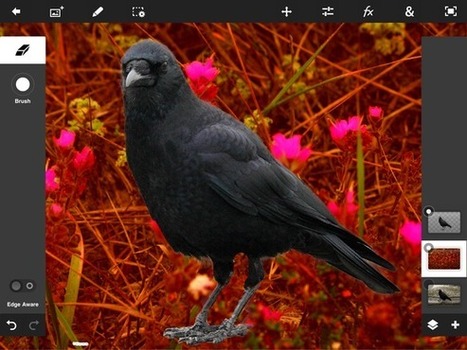
There the times when you simply can’t (or don’t want to) hop on your computer to edit or put special effects on a photo. But that doesn’t mean you’re stuck with a shot you’re not totally in love with. You can give your photos almost that full-on Photoshop treatment with Photoshop Touch, the mobile app for iPhone, iPad, or Android.

Not only does Photoshop Touch offer much of the depth of Adobe’s flagship image editor, it also sports an easily understood interface with all the familiar Photoshop tools, such as layers, adjustments, filters, curves, levels—the works.

Photoshop Touch is designed as a more professional tool than the legions of consumer-level image editors competing for the Twitter and Facebook crowd, such as iPhoto for iOS, Perfectly Clear, or even Adobe’s own Photoshop Express. This app is tailored for discerning photographers who want just the right shot to share with others on the go. But, of course, you can use it to edit for social networks too.

Kitty Fisher's insight:

What got we was, if you don't want to or can't get to a computer, Photoshop Touch is a mobile app that offers majority of Abobe's image editor. Although this is a more progressive, professional tool. So if you you just want an effects app, this won't be the one for you. But if you understand adjustments, curves, levels and layers...then this may be the app you are destined to have.

No comment yet.
Scoop.it!

Eye-Catching ND Patterns + Shapes Effects Now Available in Tangent 1.2

Eye-Catching ND Patterns + Shapes Effects Now Available in Tangent 1.2 | Image Effects, Filters, Masks and Other Image Processing Methods | Scoop.it

The photo app development team at Pixite LLC, in partnership with award-winning creative technologist Ben Guerrette, is excited to announce the addition of ND Patterns + Shapes pack by photographer and designer Neal Dieker in Tangent 1.2 for the iPhone and iPad. The pack is based on NDPATTERNS, the downloadable pattern overlays by Neal Dieker widely used by photographers and artists to create stunning effects on photos. NDPATTERNS overlays have been downloaded over 100,000 times and used in over 75,000 images on Instagram.

Users now can directly apply NDPATTERNS overlays using the ND Patterns + Shapes pack inside Tangent 1.2, a creative tool that lets anyone easily transform their photos into one-of-a-kind works of art using combinations of patterns, shapes, and blends. ND Patterns + Shapes quickly adds effects that can subtly change or completely alter the look and feel of a photograph, a skill set once reserved for graphic artists.

"As one of the many inspirations behind Tangent, Neal's patterns are a welcome addition that fit nicely into the geometric photo overlay theme," says Tangent's creator and lead developer Ben Guerrette. "ND Patterns + Shapes stands out by taking a more subtle approach to the image enhancement capabilities of Tangent while showcasing the wide range of effects that the app provides."

The eye-catching patterns and shapes included in the pack are some of many included in Tangent.

Kitty Fisher's insight:

As you skim across of the words on-fo-a-kind works of art, well you have my attention. With NDPATTERNS overlays working with the ND Patterns + Shapes pack inside of the Tangent 1.2 tool. You can transform any photo into a relentless, brilliant graphic art. Genius for eye popping colors and new graphic adventures.


No comment yet.
Scoop.it!

olloclip iOS iPhone App - Updated - TheAppWhisperer

olloclip iOS iPhone App - Updated - TheAppWhisperer | Image Effects, Filters, Masks and Other Image Processing Methods | Scoop.it

olloclip the developers of the wonderful and incredibly popular 3-in-1 lens system have just updated their olloclip app with a brand new look for iOS 7. If you’re still on iOS 6 though, you will also get the new look!

There’s a custom preset system for cropping allowing you to fine tune the edges of your image for the specific Olloclip lens that you’re using, with one tap.

Kitty Fisher's insight:

I've been seeing this neat, tiny app popping up at every corner of the internet. With the new olloclip iOS updated to the iOS 7, do not worry iOS 6 users you'll also get the new look. For those of you lucky enough to have the lens attached already, this update has re-defined, fine tuning and the specific look you are going for.

No comment yet.
Scoop.it!

Creating and Duplicating a Layer Mask

Creating and Duplicating a Layer Mask | Image Effects, Filters, Masks and Other Image Processing Methods | Scoop.it

It sounds easy, doesn’t it? Duplicate one layer’s layer mask on another layer. It is easy but only if you know the technique. A layer mask is a channel that determines the visibility of the content of that particular layer. If multiple layers require the same areas of transparency, you can create a single layer mask and copy it to the other layers. We’ll start with a look at creating layer masks. A layer mask enables you to create areas of transparency on a layer without erasing the layer content. Since the layer’s entire content is still available (although partially hidden), you can later edit the layer mask to change the visibility. NOTE: Keep in mind that a layer named “Background” (in italics) cannot have areas of transparency. Simply double-click the layer name in the Layers palette and rename the layer. That converts the layer to a regular layer, enabling you to show/hide areas selectively with a layer mask.

Creating Layer Masks
A basic layer mask can be created by making a selection of the area of the layer that you want visible and then clicking the Add Layer Mask button at the bottom of the Layers palette. In this example, the Horizontal Type Mask tool was used to create a selection in the “shape” of a zip code.

Kitty Fisher's insight:

As I've been learning to create a set of layers. Starting out with a few basics to truly get the hand of duplicating, this tutorial will help you immensely.

No comment yet.
Scoop.it!

Mastering Photoshop Techniques: Layer Styles | Smashing Magazine

Mastering Photoshop Techniques: Layer Styles | Smashing Magazine | Image Effects, Filters, Masks and Other Image Processing Methods | Scoop.it
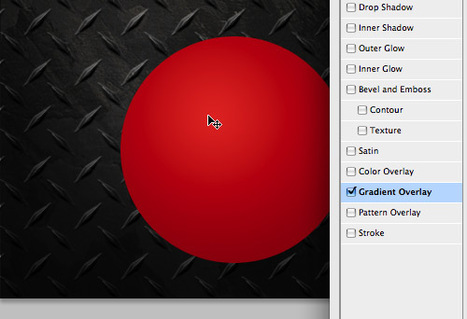
Layer Styles are nothing new. They’ve been used and abused again and again. Despite their ubiquity, or perhaps because of it, many designers do not yet realize the full potential of this handy menu. Its beauty lies in our ability to create an effect and then copy, modify, export, hide or trash it, without degrading the content of the layer.
Kitty Fisher's insight:

To redefine your design, layering can be your best friend. With different styles, it can be hard to choose which one, you want to use. So these techniques can give you a bump effect or the ever rising 3-D modeling.

No comment yet.
Scoop.it!

Matt Greer Photography: Photoshop Layer Masks Tutorial

In this tutorial we will cover masking with Paintbrush, masking using the Colour Range selection tool, how to Move, Copy and Invert masks to other Adjustment Layers, how to adjust the Mask's Edge, and finally, using the Gradient Tool to mask.

Let's first start with some background. Layer masks are applied to specific layers and affect what part(s) of a layer (or Adjustment Layer) apply to the image, and to what degree. You can black-out entire parts of a layer, or reduce its effect by greying-out parts of the layer.

We discussed Adjustment Layers in another tutorial, but you are not limited to this kind of layer.

Let's say you apply a Curves layer or Levels Adjustment Layer, but once it is applied, you realize there is part of the image you do not want that layer to affect. What to do? Go to your layers window, click on the mask (white box) next to the layer you want to mask. Now, take your paintbrush, set the size and opacity (Keyboard Shortcuts) you need, and paint with the paintbrush over the part of the image you want to change.

Kitty Fisher's insight:

This may be a lengthy tutorial but it will give a very understandable view for Masking with a Paintbrush. It is stated what should be noted when it comes to layer masks using only shades of grey.

No comment yet.
Scoop.it!

may nineteen: How to: Overlay on PicsArt

may nineteen: How to: Overlay on PicsArt | Image Effects, Filters, Masks and Other Image Processing Methods | Scoop.it

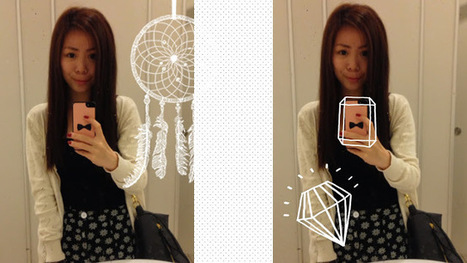
Recently found people "drawing" cute stuffs on their pictures and upload to Instagram? When asked for the app they use, "PicsArt" was always the answer? However you explored that app but still can't get those "cute drawings"? Then you have not explored hard enough! I am someone who prefer exploring the apps I downloaded before asking how to do, I don't usually ask unless I really don't know how. I am quite a 爱面子 kind of person. Hahaha. Yesterday I spent about half an hour figuring out how to get those "cute drawings". The correct term for that is actually "overlay". I saved a number of overlays into my phone and created an album specially for that. I will not be uploading them here because it does not belong to me. I googled "overlay PicsArt", I too grabbed a few from @laneoverlays (instagram).

No comment yet.
Scoop.it!

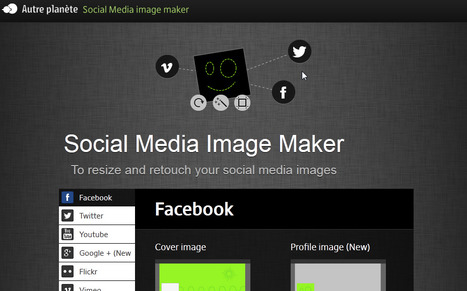
Social Media Image Maker Creates Perfect Fit Images, Awesome Effects

Social Media Image Maker Creates Perfect Fit Images, Awesome Effects | Image Effects, Filters, Masks and Other Image Processing Methods | Scoop.it

If you’re reading this, chances are that you already know how important your social media images can be when building a brand. It's the very first thing people look at when visiting your social networking sites - and we all know how important first impressions are.


AP, a design studio that focuses on graphic and interface design, recently launched its Socail Media Image Marker for just that purpose - Helping the technically impaired make awesome social media images for their social network websites.


The online tool allows visitors to import, resize, and edit profile images in an easy to use interface, and since Social Media Image Maker supports all of the major social networks you shouldn't have a problem finding yours using the tool.


Social Media Image Maker is a completely free online service that supports over a dozen social networking sites, from Facebook and Twitter, to Pinterest, Tumblr, Linkedin, Google+, and Foursquare.

Kitty Fisher's insight:

As a social media user, having a free online service that is solely for the purpose of awesome effects and fit images...is a dream. This works on any media site, all of them. Just check it out and see if it fits your persona.

No comment yet.
Scoop.it!

Effect Brushes, Pixastic and Apple's New Granted Patent...

Effect Brushes, Pixastic and Apple's New Granted Patent... | Image Effects, Filters, Masks and Other Image Processing Methods | Scoop.it

Brush effects have been this weeks main eye candy. From the smokey text effect that has a supernatural and eerie quality. And just time for Halloween. Moving away from text we have the elaborate portrait brush effect in the illustrator category. So now with the Bristle Brush creating that illuminous layered effect can be a bit simplier...and can help to bring out your creative endeavours.

JaveScript has been installed to nearly every computer device. So knowing that it's image processing library is reliable but be sure to check out with your browser. Like Chrome it works on a different channel, compared with FireFox and Opera. If you are a bit more of a manual individual this could be your forte, because normally you would loose important data and pixel information. But uing the RAW format...you'll have every ounce of information required to keep the high quality you want to keep in your image.

Apple has some secrets that not a lot of people know about, even some working within Apple. But of course so information always slips between the cracks for the internet to grab ahold of. With the iOS 7 out, knowing that the company continues to surpass the regions of depth and image processing, is hard to keep track of. Soon Apple will have solved all of the glitches and possible loop holes within our mobile devices and tablets. I guess that means we can just sit back and wait, since this patent is on the table and ready to be talked about.

No comment yet.
Scoop.it!

Adobe Photoshop CC filters help salvage photos once deemed unusable| Digital Trends

Adobe Photoshop CC filters help salvage photos once deemed unusable| Digital Trends | Image Effects, Filters, Masks and Other Image Processing Methods | Scoop.it

If you haven’t already heard, Adobe has abandoned its Creative Suite (CS) in favor of the Creative Cloud (CC), a dramatic move that’s still echoing throughout the software community. Now, instead of paying for a perpetual license for the software collection or each application, users pay a monthly service fee of $10 a month for an individual app, such as Photoshop, or $50 a month for the entire Creative Cloud, which includes access to new features, products, and cloud storage, depending on the membership p­lan. (Special pricing is also available for students, teachers, existing customers, and those upgrading from the Creative Suite.) For professionals, the cloud provides better collaboration tools for working in teams, but the recurring monthly fee is a turnoff for many. At the same time, a monthly fee can be easier to swallow than a several thousand dollar cost upfront.

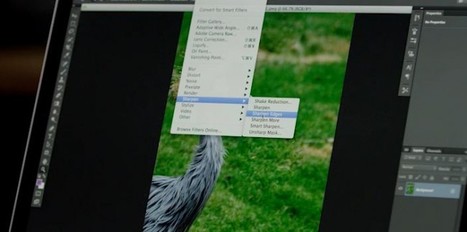
Photoshop CC, which recently shipped along the rest of the Creative Cloud suite, introduces new filters (including non-destructive smart filters that don’t overwrite original image data — more on this later), enhanced Adobe Camera Raw functionality, and integration with the cloud. Adobe recently gave us a tour of the new software. Here, we’ll walk you through Photoshop CC’s main highlights.

Most of the features worth getting excited about in Photoshop are filters. The addendum to this latest version will make you wonder if actual photography skills are even needed in a world with such robust post-processing tools readily available. Of particular note, Camera Shake Reduction is mind blowing in effectiveness and simplicity of use.


Kitty Fisher's insight:

Wondering if your photo or not will be worthy of Photoshop can keep you guessing. Lucky you if you've been messing around with the Photoshop CC because as one description puts it 'it's as if you didn't need to take a good photo in the first place.' Or at least that's what they are giving off, and yeah, they are more than likely right about that one.

No comment yet.
Scoop.it!

Creating a Conceptual Image Mixing Digital Collage Techniques, Textures and Filters

Creating a Conceptual Image Mixing Digital Collage Techniques, Textures and Filters | Image Effects, Filters, Masks and Other Image Processing Methods | Scoop.it

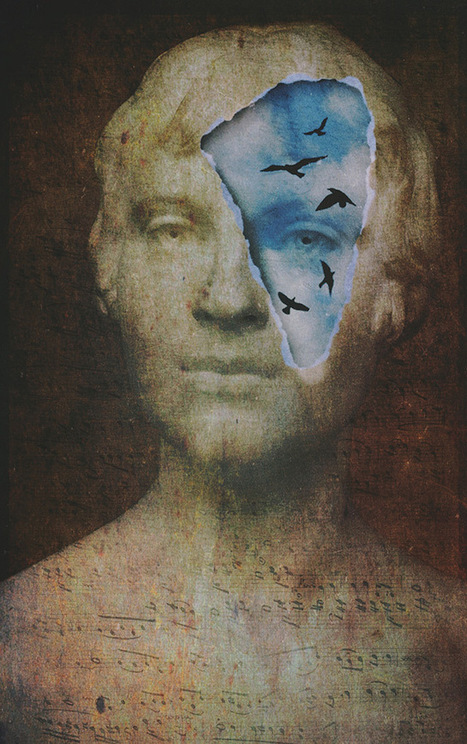
What you’ll learn I will show you how I assemble and process photos creatively to create conceptually captivating imagery that goes beyond the individual “matter-of-fact” shot. The time this will take may vary… a lot. For some pictures I use photos I have been collecting for a couple of years, for others I will gather the necessary images in a single afternoon. Some of the best places to find great material for this kind of project are antiques shops, flea markets, museums, historical sites, and so on.

I create a blank document in Laminar, the same size as my statue image.

I open the statue image through Add a Layer. In the Layers panel, I tap on Mask. This will take me to the mask editor. With the default tool, the brush, I proceed to erase the original background to show the texture layer behind it. I use a soft brush by decreasing hardness value to around 50 in the Properties panel. While erasing, I resize the brush and zoom in and out with pinch gestures for precision. If I make mistakes, I go back to a previous state with History or I switch to the eraser tool to bring back parts of the image I accidentally brushed out. I tap on Apply when I’m done masking. I save what I have so far.

In this case it was not needed, but after masking, you can use Laminar’s Adjust and Edit tools to match color tones and luminosity between background and foreground.

Kitty Fisher's insight:

I found this compelling. For art students everywhere this could be your ticket to creating a perfect image of a study project on Greek Myths. Using mixed digital collages, while filtering in textures and filters can end up like a pile of rubbish. But with this tutorial and while using iphoneography, this could be the piece you are know for.

No comment yet.