Image Effects, Filters, Masks and Other Image Processing Methods
25.3K views | +0 today
Follow
Your new post is loading...
Scoop.it!

5 Tips for Taking Amazing Instagram Pictures

5 Tips for Taking Amazing Instagram Pictures | Image Effects, Filters, Masks and Other Image Processing Methods | Scoop.it

Welcome to our first ever tips post! We're really excited about this column! The gist of it is everyone month one of us (or a guest expert!) will compile a list of quick helpful tips you can use to towards something creative. Take your photos in your regular camera app.

Kitty Fisher's insight:

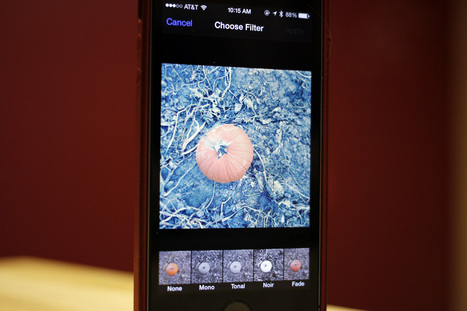
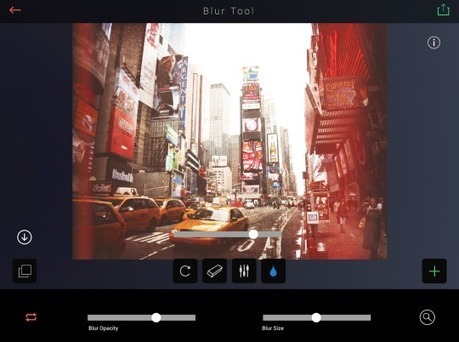
Tips for Instagram, who would have thought. But filters are the name of the game. So if there is a filter that you choose all the time, go through the list testing out each one. You may be pleasantly surprised.

No comment yet.
Scoop.it!

UV Filters: Do They Degrade Image Quality? - The Phoblographer

UV Filters: Do They Degrade Image Quality? - The Phoblographer | Image Effects, Filters, Masks and Other Image Processing Methods | Scoop.it
UV filters, do they degrade your image quality, or are they actually useful? This is a question asked by many, and often answered in many different ways. My goal is to provide you with a meaningful answer based on my experience.
Kitty Fisher's insight:

What you need to know, when it comes to UV filters is that, if you still are shooting with film. Then yes you'll need a UV filter. But otherwise, with an updated camera, which isn't sensitive to UV light...you don't need that extra bundle of UV lenses.

No comment yet.
Scoop.it!

Ultimate Guide to Color Lookup and Photo Filter Adjustments | Psdtuts+

Ultimate Guide to Color Lookup and Photo Filter Adjustments | Psdtuts+ | Image Effects, Filters, Masks and Other Image Processing Methods | Scoop.it

In this tutorial, we are going to have a look at two Adjustment Layers: the Color Lookup, and the Photo Filter Adjustments. Both of them can be used to automatically remap the colors of your images.

Kitty Fisher's insight:

In a bit of guidance to Adjustment Photo Filters. Plus the Color Lookup, you'll discover how to embellish the intensity of the colors in the image.

No comment yet.
Scoop.it!

A guide to street photography: Gavin Harrison's smartphone art - Engadget

A guide to street photography: Gavin Harrison's smartphone art - Engadget | Image Effects, Filters, Masks and Other Image Processing Methods | Scoop.it

Street photography is the purest, most spontaneous way to create art with a camera. No studios, no props, no poses; all you need is the right equipment and a street with people on it. In this original series for Engadget, we'll follow three seasoned street fighters and try to glean some practical wisdom about what engages their eyes, brains and fingers in the moments before they shoot.

Lindsey Davis's insight:

Ever wondered how to best capture what's around you? Engadget's original series follows three of the most successful street photographers, who do all their work from the streets on their iPhones. 


Filters play a big role in perfecting the image, and the photographers carefully select the filter that best suits the subject matter of each image. Want to learn their secrets? Read on. 

No comment yet.
Scoop.it!

Open Source iOS Image Editing Component With A Great Interface Providing Image Filters And More

Open Source iOS Image Editing Component With A Great Interface Providing Image Filters And More | Image Effects, Filters, Masks and Other Image Processing Methods | Scoop.it

Previously I mentioned a full-featured commercial component with a free option allowing you to add in a nice image editor into your apps called the Aviary SDK.

Here’s a nice image editing component you can drop into an app called CLImageEditor from Sho Yakushiji with a great looking interface.

CLImageEditor includes a large number of tools for filtering, cropping, rotation, and more.

Here’s a set of images showing CLImageEditor in action.

Kitty Fisher's insight:

This open source iOS image editing called Aviary SDK, lives up to it's name. I actually use this Aviary and alternatively I use this app before I place my photos on Instagram. Try out the different effects and play around with the settings, you may be surprised.

No comment yet.
Scoop.it!

How To Save An Underexposed Photo Using Lightroom

How To Save An Underexposed Photo Using Lightroom | Image Effects, Filters, Masks and Other Image Processing Methods | Scoop.it

To save an underexposed photo there are a few different things we can try from working with what we have to converting to black and white and more. 


Before you give up hope and assume that your shoot is a complete failure there are a few things you can do to try and salvage the underexposed photographs that you've taken.


I'm going to be presenting you with three techniques that you can use to ger the most out of what you have. However it is important to note that every photograph is different and will present its own unique set of challenges. These three ideas will give you something to try in the event that you do get home and find your photographs have taken a turn for the dark side, but they might not be able to bring them back, sometimes they truly are too far gone.


Save what you can get rid of what you can't. By simply adjusting the basic settings a bit to expose for the sky in the photograph I create a simple silhouette of the trees and leave it at that. The final step was to clone out the little bits of the run down shack that were peaking out asking for attention, but not adding to the photograph.


Use Graduated Filters and Adjustment Brushes until you can't use them anymore.

Kitty Fisher's insight:

Underexposure will happen, no matter what you do.  But with Lightroom, using graduated filters and adjustment brushes you can bring the color out in the photo. Or usually you will have to switch the image over to Black and White.

No comment yet.
Scoop.it!

Projectwoman | See how to give an image a more artistic look with...

Projectwoman | See how to give an image a more artistic look with... | Image Effects, Filters, Masks and Other Image Processing Methods | Scoop.it
See how to give an image a more artistic look with the Photoshop Accented Edges and Halftone filters.
http://youtu.be/-S7TgEYa_DA


Kitty Fisher's insight:

I found this tutorial a reliable source. The site Projectwoman also has a youtube that deals with making a photo appear more artistic by using the Accented Edges and Halftoned Filters. The photo already had an interesting quality but I felt that she gave it a story by adding these Photoshop filters.

No comment yet.
Scoop.it!

Matching the Production Style to the Image - High Energy Means High Contrast - Digital Photography School

Matching the Production Style to the Image - High Energy Means High Contrast - Digital Photography School | Image Effects, Filters, Masks and Other Image Processing Methods | Scoop.it

Introduction The Following is an excerpt from the SLR Lounge Lightroom Preset System v5 and accompanying workshop from the Lightroom Workshop Collection v5. The Lightroom Preset System is designed to take you from Ordinary to Extraordinary photos in just a few seconds and clicks within Lightroom 4 and Lightroom 5. 


Overview:


One thing that we like to do within our studio is match the post production style to the overall emotion and story within the image. We feel that doing so leads to a much stronger overall image.


So in scense that have a lot of energy, we want to emphasize the excitement with a colorful, high contrast production style. For this tutorial, we are using this sparkler exit photo which should be well complimented by the high contrast edit. The SLR Lounge Lightroom Preset System v5 has presets specifically for high contrast portraits which we are going to apply to this photo. Not to worry, we are going to demonstrate all of the settings below.


Lightroom Preset System v5 Mixology

For those who have the Preset System, you can follow the Mixology Recipe below to get to the same results. If you don’t have the Preset System, please read the article or watch the video below to see exactly how this look was achieved.

- See more at: http://digital-photography-school.com/matching-production-style-image-high-energy-means-high-contrast#sthash.YtyVQpxu.dpuf
Kitty Fisher's insight:

Adding a high contrast to your image can take it from ordinary to extraordinary. And Lightroom matches the post production style with the overall story.

No comment yet.
Scoop.it!

Remove a filter from a photo in iOS 7

Remove a filter from a photo in iOS 7 | Image Effects, Filters, Masks and Other Image Processing Methods | Scoop.it

Using the filters in iOS 7's Camera app is a fun way to spruce a photo. For whatever reason, iOS 7 doesn't deselect a filter after you exit the Camera app, leading you to inadvertently filter some photos.

For example, if you take a pic using any of the available filters, exit the app, and then awhile later quickly launch the camera to catch an impromptu photo, the filter is still selected and thus applied to your photo.

Luckily, there's a quick and easy way built into iOS 7 that allows you to change or remove filters from a photo.

Kitty Fisher's insight:

Putting filters on a photo is simple as pie. But taking one off can be a hassle, meaning you should have saved the original before changing it. iOS 7 has made it now, as simple as pie to change or remove filters from a photo.

No comment yet.
Scoop.it!

CSS3 Image Filters

CSS3 Image Filters | Image Effects, Filters, Masks and Other Image Processing Methods | Scoop.it

I'm a big fan of some of the experimental CSS properties that the browsers vendors are developing. In previous tutorials I have looked at some of the new features which I think are really useful.


In this tutorial we are going to look at a great new features called CSS filters. This is a new feature that can be used on both HTML elements and images, but I think it's best used on images and can create nice effects on image galleries.

Using just CSS you are able to create all these effects on images.

  • Greyscale
  • Blur
  • Saturate
  • Sepia
  • Hue Rotate
  • Invert
  • Brightness
  • Contrast
  • Opacity
Kitty Fisher's insight:

Looking at CSS Filters, as an image filter instead of just using it in your html browser. It already has all the general sepia, greyscale and of course brightness and contrast. This tutorial gives a good argument that the CSS image filter can be used to the best of it's ability as well as the majority of any other image filters.

No comment yet.
Scoop.it!

Lomography goes digital with experimental Micro Four Thirds lenses

Lomography goes digital with experimental Micro Four Thirds lenses | Image Effects, Filters, Masks and Other Image Processing Methods | Scoop.it

Lomography's film cameras have a devoted following, but the company's new product is aimed squarely at the digital world. The Experimental Lens Kit is a set of three lenses designed to let you shoot multiple exposures - one of the most distinctive effects of Lomography film photos - on your Micro Four Thirds camera. Other companies such as Fujifilm have released cameras that recreate the effect in software, but the Lomography lenses actually have a built-in mechanical shutters to produce multiple exposures optically.


The pack includes a 24mm standard lens, a 12mm wide-angle lens, and a fisheye lens with a 160-degree viewing angle. All three lenses have an aperature of f/8, a shutter speed of 1/100, and a bulb mode; they also come with colored gels that you can insert into a handy slot for filter effects. you won't be getting the best conventional image quality from these lense, of course, but at $89 for the set it could be a fun way to start a Micro Four Thirds collection after picking up that new Panasonic GM1.

Kitty Fisher's insight:

These series of new lenses from Lomography, The Experimental Lens Kit has three designed that lets you shoot multiple exposures. One of a kind images of over lapping cities, a portrait with flowers and the sky layered on top. These filters add a whimsical view to the world.

No comment yet.
Scoop.it!

VSCO Cam™

VSCO Cam offers a number of filters and effects that give your photos a classic, vintage film look, but with expanded control settings.

While other apps will slap a filter onto your photo and call it a day, VSCO Cam lets you take things a bit further by fine tuning exposure, contrast, saturation, white balance, hue, vignette and even simulated film grain.

If the included filters and features aren't enough, VSCO Cam sells a huge array of additional filter packs and effects. We do feel like the differences between some filters are negligible, or not great enough to warrant purchasing, but you can preview them yourself and decide whether you want to spend a few bucks on it.

Kitty Fisher's insight:

As a filter based app, this has a retro touch to it. VSCO Cam, gives you the feeling of looking at your 1960's-70's grandparents or parents photo album. And with a touch like that, that makes me want to try out this app to see how I could interpret my own photos.

No comment yet.
Scoop.it!

plasq.com Comic Life 2

plasq.com Comic Life 2 | Image Effects, Filters, Masks and Other Image Processing Methods | Scoop.it
Expand what you can do with your digital photos! With a comprehensive set of features, Comic Life 2 gives you numerous ways to explore your creativity - liven up holiday snaps, tell a story, even create how-to guides!

This latest version of plasq’s award winning photo comic creation software is funner, easier and better for kids and ... big kids!
 
Comic Life 2 adds powerful new features without losing its legendary ease of use that has made it so popular with everyone.
Kitty Fisher's insight:

It may say big kids but this could be fun, even for the younger ones. I'm a sucker for the comic layout, taking a couple of images and putting them in a template to start out, what could be a hilarious in-side joke or family fun with the people that you love.

No comment yet.
Scoop.it!

What's New in Filter Forge 4.0? | Psdtuts+

What's New in Filter Forge 4.0? | Psdtuts+ | Image Effects, Filters, Masks and Other Image Processing Methods | Scoop.it
In this article, we will explain what you need to know about the new features in Filter Forge 4.0.

This versatile Photoshop plugin, which can be used to create many different types of textures and effects. Its online Filter Library provides instant access to more than 9,890 free community-created filters.

Kitty Fisher's insight:

Being able to combine compinents for making your own filters, well Filter Forge has just that. If you want to find out what is in the new 4.0 edition, check out this article to see if you'll be able to take your eyes off of the long list of possibilities.


No comment yet.
Scoop.it!

Neutral Density Filter Fireworks Photography - Digital Photography School

Neutral Density Filter Fireworks Photography - Digital Photography School | Image Effects, Filters, Masks and Other Image Processing Methods | Scoop.it
A Guest Post from Tom Bricker from DisneyTouristBlog.com As most landscape photographers probably know, neutral density filters reduce the intensity of light reaching the lens, to allow longer shutter speeds or larger apertures.

Neutral density filters reduce the intensity of light reaching the lens, to allow longer shutter speeds or larger apertures. Think of them as sunglasses for your lens.

Kitty Fisher's insight:

Neutral density filters, allow for a longer period for your shutter speed, along with using the same aperture and ISO. Fireworks are always that spectacle that is hard to register, but never the less their is a way to capture the array of scenery.

No comment yet.
Scoop.it!

Using Image Effects Filters in your C++Builder for iOS apps

In this video I show you how to work with Image Effect Filters in your iOS apps using C++Builder XE5. The FM Application Platform provides more than 50 image effects and filter effects classes for you to use in your apps. The image effects use the Pixel Shader language and the GPU to work with bitmap images while offloading the CPU. I created a FM Mobile application for C++Builder using the Blank Form mobile project template. I added a TTToolBar component aligned to the top of the client area.  On the toolbar I place TLabel (for the app title) and TSpeedButton (to load a jpeg image) components. I place a TTrackBar component just under the TToolBar by setting its Align property to alTop.  The TrackBar is used to set the amount (a percentage) of filter effect to apply to the image. In a TLayout, aligned to the client area, I place two TImage components (aligned left and right inside the TLayout).

Kitty Fisher's insight:

If you use C++Builder for iOS apps, you'll want to take a look at this. Also if you're having trouble using Image Effects, you'll find some useful information that you may be missing.

No comment yet.
Scoop.it!

Alayer (Photo App) Now Available For iPad - TheAppWhisperer

Alayer (Photo App) Now Available For iPad - TheAppWhisperer | Image Effects, Filters, Masks and Other Image Processing Methods | Scoop.it

Loran Dyrmishi today announces Alayer 1.0 for iPad, an essential tool that will give anyone unprecedented control over the aesthetics of their photos. With Alayer, you can elevate your simple snapshots while enjoying the benefits of a streamlined photo editing workflow. Add an infinity of layers on your photos. Featureing more than 80 customizable textures, Alayer offers 15 different blending modes. With Alayer you can choose your Own Textures or other images to Blend with your photo.


"Alayer really lets individuals unleash their inner artist," said Loran. "We've included a roster of unique tools to help the users create the most beautiful photos possible right within the app. We can't wait to see what amazing images our fans will produce."


This app comes with the love for photography. The possibilities with Alayer are unlimited. You have total control over your texture layers. Change the sharpness, unsharp, hue, saturation, exposure, contrast, brightness or the red, green and blue level of your texture layers. You can rotate, change the opacity, hide, move or delete any of the layers. Change the layers at any time. Drag the layers and see in real time the resulted photo. With a streamlined editing workflow you can change and modify any texture of any layers you have added before.

Kitty Fisher's insight:

Alayer comes out of the wood work for the iPad, which gives us the essential ability to have control over every asepct of our photos. They use a small catch phrase, "add an inifinity of layers on your photos." Maybe over loading your images is something you like to give off a certain look, but this may not be for everyone.

No comment yet.
Scoop.it!

Apply Image Filters Using CoreImage Framework in iOS | TechNet

Apply Image Filters Using CoreImage Framework in iOS | TechNet | Image Effects, Filters, Masks and Other Image Processing Methods | Scoop.it

In this tutorial, we will see about Core Image & how to apply different image filters. We will also see how to apply different filters and cool effects to images in realtime. 


Some of the most important calsses of Core Image framework are


CIContext: All Core Image processing is done in a CIContext


CIImage: It holes the image data.


CIFilter: There is a dictionary of ilter class which defines the attributes of the particular filter like vibrance filters, cropping filters, color inversion filters and much more.


Some basic steps to setup the project and getting started

  1. Create an iOS project from your Xcode with single view application.
  2. Add the CoreImage.framework in the project.
  3. Add one sample image in the resources folder and include in the project.
  4. As the application is single view application, there will be a ViewController class in the application. Add one UIImageView in ViewController.xib file and connect with the UIImageview object defined in your interface class.

Basic Image Filtering

Lets see an example by simply running an image through a CIFilter and displaying it on the screen. We need to do following four things every time whenever we want to a apply a SIFilters to an image.

Kitty Fisher's insight:

Using filters on CoreImage Framework in iOS, which bring out the vibrancy or exposure of each photo. While using multiple filters for a single image, or the filters can be grouped to create one combustion of a single filter.

No comment yet.
Scoop.it!

Guide: Choosing DSLR Lenses & Filters

Guide: Choosing DSLR Lenses & Filters | Image Effects, Filters, Masks and Other Image Processing Methods | Scoop.it

Here's a guide to upgrade your camera kit with lenses and camera filters.

Understanding the importance of IS, VR, OS, and VM Lenses
If you don't have very steady hands, it is advisable that you opt for lenses with built in optical image stabilisation. Nikon's Vibration Reduction (VR), Tamron’s Vibration Compensation (VC), Canon's Image Stabilisation (IS), and Sigma's Optical Stabilisation (OS) systems, promise to offer sharper images. This effectively means slight physical shakes are controlled and corrected within the lens itself. While adding such technology to the lens does make it expensive, you will find a noticeable difference when using high-zoom tele-lenses, or when taking low-light shots. On the other hand, it does make you a steady photographer and improves your breathing control, if you avoid picking one with stabilisation functions.
What are USM, STM, SWM, HSM, and USD, and how does that affect your lens?
Those of you who want a lens that supports autofocus (AF) would require any of the above mentioned kind of lens brands. USM is canon's Ultrasonic Motor lens (Stepping Motor for new-gen lenses), SWM is Nikon's Silent Wave Motor lens (also known as Auto Focus - Silent Wave or AF-S), HSM is Sigma's Hyper-Sonic Motor, and USD is Tamaron's Ultrasonic Silent Drive (PZD – Piezo Drive for non-ring type ultrasonic motors). So basically if your lens has any of the acronyms, depending on its brand obviously, you know that it supports autofocus.
Kitty Fisher's insight:

Shopping for a DSLR filters and Lenses is a heavy task. Would you rather opt for a built in optical image stabilization lense or would you simply just want a lens that supports auto focus? The world of lense is large and knowing which one you need, triumphs over the one you want.

No comment yet.
Scoop.it!

Photoshop Filters Tutorials | Glass Image

This Photoshop tutorial features the glass image filters.

Kitty Fisher's insight:

The glass image can be a debate between stained glass and an elegant view towards what filters you would wont over your design or photograph.

No comment yet.
Scoop.it!

Fast Image Filters with WebGL - PhobosLab

Fast Image Filters with WebGL - PhobosLab | Image Effects, Filters, Masks and Other Image Processing Methods | Scoop.it

So, yes, there's already a library called glfx.js which basically does the same thing. And I'm almost saddened to say that it's excellent.


It's not all in vain, however. My implementation features raw convolution and color matrix filters. The latter should be particularly interesting for those coming from the Flash world: it's the exact same as Flash's ColorMatrixFilter and allows for some nice "Instagrammy" photo effects among others. There are some JavaScript libraries around that implement this ColorMatrixFilter, but they all do it in JavaScript directly, which is quite slow. Mine can be used in realtime, even on iOS with Ejecta.


I also learned some things about WebGL and Shaders with all this. One interesting aspect is that you can't draw a framebuffer texture onto itself. So in order to apply more than one effect for the same image, you need to juggle around 2 textures - use one as the source, the other one as the target and then switch. And if you don't want to waste any draw calls, you need to know which draw call will be the last, so that you can draw directly onto the target Canvas instead of on a framebuffer texture.


WebGL's coordinate system also complicates things a bit. It has the origin in the bottom left corner, instead of in the top left like most 2D APIs, essentially flipping everything on the Y axis. This has caused me a lot of pain with Ejecta already. The solution sounds trivial: just scale your drawing coordinates by -1, but this only gets you so far. If you need to get the pixel data of your image or draw one canvas into another, you suddenly have to invert everything again.

Lesson learned: Always google before you start working.

Kitty Fisher's insight:

This library called glfx.js and apparently it's excellent. With a raw convolution and color filters an if you know how to work with Flash...then this is exactly what you've worked with before. This JavaScript libraries and it can be used on iOS an Ejecta.

No comment yet.
Scoop.it!

Real Life Instagram Injects Photo Filters Into The Real World

Real Life Instagram Injects Photo Filters Into The Real World | Image Effects, Filters, Masks and Other Image Processing Methods | Scoop.it

Instagram has been extremely popular as more and more people are signing up to the photo-sharing social media service to show off not only their photos, but videos, too. Instagram's filters can certainly turn a normal photo into a piece of art, although London's Bruno Ribeiro decided to take the concept of the service's filter and implement them all over his fair city.


Real Life Instagram

is the name of Ribeiro’s project, which simply puts up pieces of paper that looks like it was taken straight out of an Instagram feed, complete with username, profile photo, location and even how many “Likes” it received as well as hashtags. Ribeiro looks like he cuts out a square out from the piece of paper and simply inserts a colored piece of transparent plastic sheet in the hole, making the Real Life Instagram image. The idea seems pretty neat, especially how much better some of the Real Life Instagram images make the original subject look. We’re not sure what Ribeiro uses in order to judge just how many likes an photo will receive as some seem kind of low with only 40 likes, while others have over 600 likes. We have a feeling he might have inflated some of the likes he’s received for some of his images.
Kitty Fisher's insight:

The real life Instagram, Bruno Ribeiro has been going around his own city and placing pieces of paper that looks like it was screen capped from the Instagram feed. No one knows what he uses to judge the photos and how many likes they would eventually receive. Taking the digital world by storm, Instagram has now transferred over to reality.

No comment yet.
Scoop.it!

Five Frightening Filters for Instagram

Five Frightening Filters for Instagram | Image Effects, Filters, Masks and Other Image Processing Methods | Scoop.it

Five favorite frightening Instagram filters to make your Halloween photo experience more scary and fun.


The Hudson filter puts a little chill in the air with blues hues and slight fading effect. It is perfect for outdoor photos like bare trees, scattered leaves and old buildings. This filter will immediately give your images an icy look by altering the light in the photo. You'll be feeling chills in more ways than one.


Your little one is ready to head out the door for a night of trick-or-treating festivities.


Give your photos a rich, weathered look with Brannan. Darken the deep colors and soften the neutrals with this filter and take your pictures back to the 19th century. This filter will add ominous shadows on any photo, from scenery to haunted houses. Brannan also gives your photos a 'classic look' using its metallis tint that is reminiscent of film photography.

Before your photos get lost in darkness of the night, use the Earlybird filter for a faded photo look with vignette edges and sepia tinting. It turns the warmest photos into dramatic, vintage creations that could have been found in a creepy attic.
Kitty Fisher's insight:

Halloween, oh halloween. What to cast dark luminous shadows on your photo that you took down by the railroad tracks? These 5 filters have been deemed, a spooky set of the perfect haunting or the Halloween varitey.

No comment yet.
Scoop.it!

Removing filters applied to photos in the iOS 7 camera app

Removing filters applied to photos in the iOS 7 camera app | Image Effects, Filters, Masks and Other Image Processing Methods | Scoop.it

You know the scenario -- you try to take a creative photo by applying a filter and then hate how it turns out. You decide to snap another shot, but the moment is gone, an you are left with an ugly photo of a beautiful scene.  If you used iOS 7 to snap your photo, then you are fortunate as you may be able to remove that offending filter. As originally described by Mac Observer, just follow these few directions below.

If you are on an iPhone 4s, iPhone 5, iPhone 5s or an iPod touch (fifth gen), then you can easily undo the camera filter in a few short steps. Just open the image in the Photos app, and click on the "Edit" button in the bottom-middle of the toolbar. When you are in editing mode as shown above, you'll notice the tri-circle icon for the filters. Tap on the filters icon and then scroll to the left to select "None." Hit "Apply" in the upper-right-hand corner and, voila! The filter will be removed. You can also change the filter to another one as I did in the image below.

Kitty Fisher's insight:

You can add filters, upon filters. But removing a filter...that can be a tricky business. Thankfully with your iPhone 4, 5 or iPod touch you can do this in a few steps. Instead of just throwing away that prefectly angled photo (because of one filter) and transform it into the image you wanted in the first place. Do not let a bad filter, make your decision, those images can be saved.

No comment yet.
Scoop.it!

CImage and img.php for image resize, crop and processing using PHP GD - Free and open source for web development - dbwebb

CImage and img.php for image resize, crop and processing using PHP GD - Free and open source for web development - dbwebb | Image Effects, Filters, Masks and Other Image Processing Methods | Scoop.it

Image is a PHP class which enables scaling, cropping, filtering effects and processing of images using PHP GD. The script img.php uses CImage to enable server-side image processing together with caching and optimization of the processed images.

Server-side image processing is a useful tool for any web developer, img.php has an easy to use interface and its quite powerful when you integrate it with your website. This is a most useful tool for any web developer who has a need to create and process images for a website.

This is free software and open source.

Kitty Fisher's insight:

Whenever I would work on various wordpress sites, knowing that a tool for web developers, could help you by the end of the day. Also knowing script img.php is just as important as creating your own website in the first place. So to help out those beginners out there, this is a free software and a helpful open source.

No comment yet.